


-
1
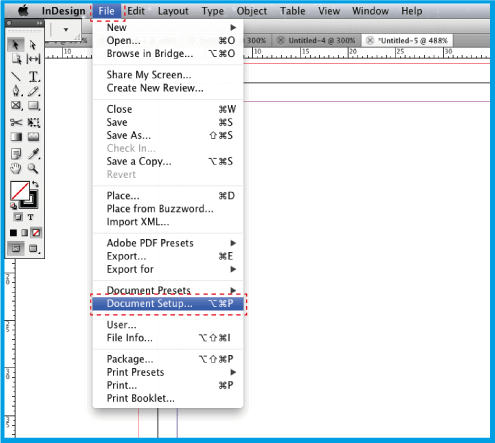
Create document
.In the upper bar select , then in .

.In place the dimension of your document.
.In define the width of your document and, in the the height.
.In if you want your document to appear vertically or horizontally.
.In the option, enter 0.078″ (2 mm) - this margin will define the security area, ie all text should be inside this area.
-
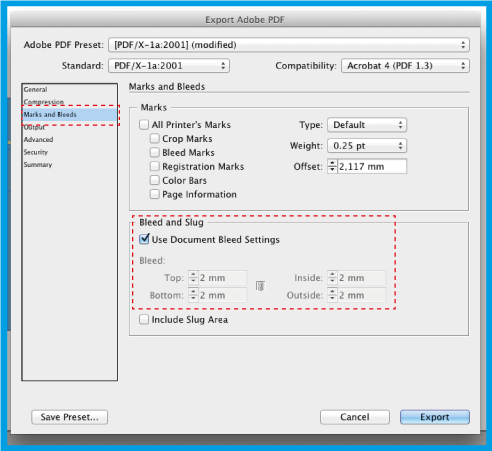
2
BLEED
.In the top menu click the button.
.N the "option.
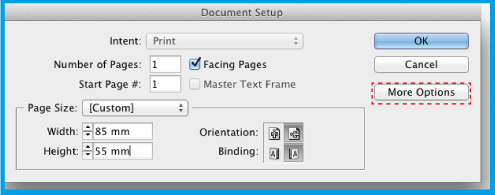
.In , type 0.078″ (2 mm) in all fields, as in the image below.
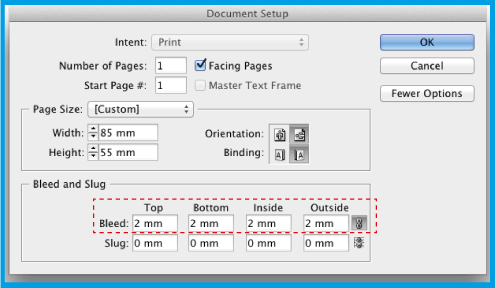
.Make your background elements (images, color, lines...) reach the edges. Do not put text outside or too close to the black outline, thus ensuring that it will not be cut.
-
3
SAVE DOCUMENT
.Go to .
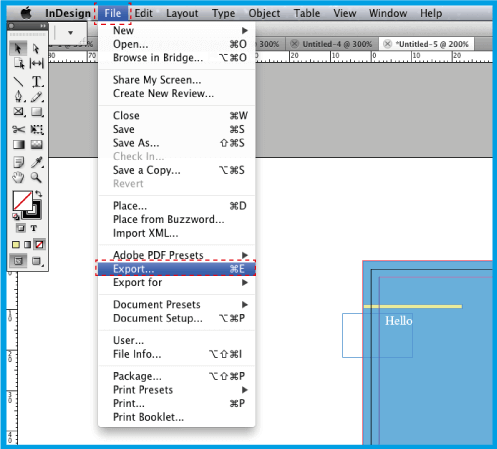
.Click .

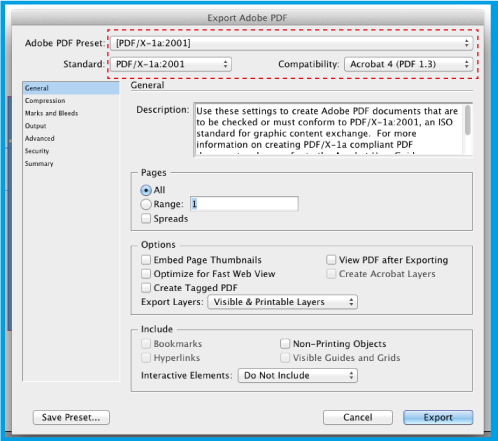
.In the window that opens, in select This option ensures that the PDF will not change.
.On the left side click and then under .
.On the left side in and then on the right side in select and just below .
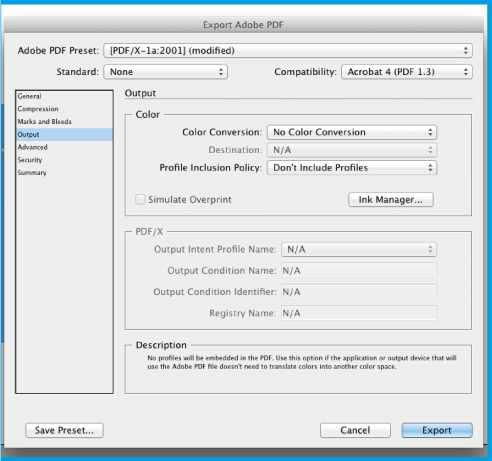
.Abaixo, clique on , save these PDF presets with whatever name you want, so you can always reuse it. Finalize by clicking .
Software guides - ADOBE® INDESIGN